Buying a home is one of the most important financial decisions you will ever make. It’s an exciting time, but it can also be a lot. You want to love the house, but you also need to know that it is safe, solid, and worth the investment.
This is where the home inspection becomes your most valuable tool.
However, many buyers are surprised to learn that one inspection does not always cover everything. Depending on the property’s age, location, and condition, you may need a team of specialists to look more closely. Understanding the different types of home inspections available helps you uncover common underlying issues before you sign on the dotted line.
Below is a comprehensive guide to help you navigate the various inspections you might encounter during a real estate transaction.
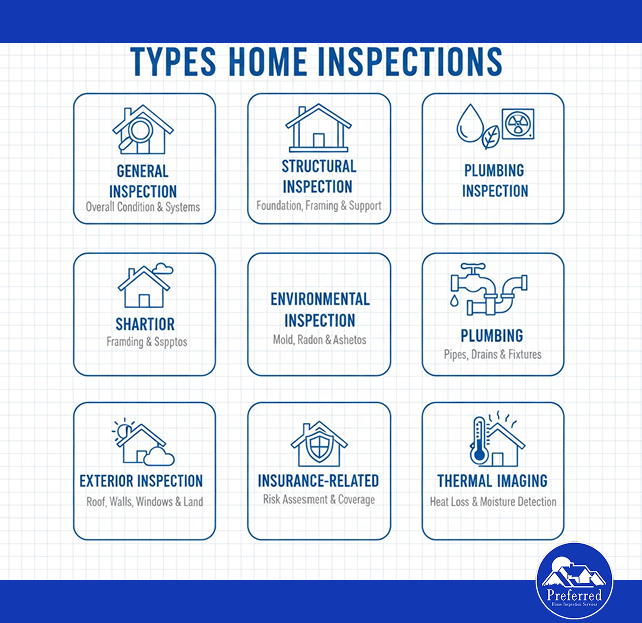
What Are the Types of Home Inspections?
From the essential baseline checks to specialized assessments for unique hazards, here is a breakdown of the different inspections you should consider to make sure no stone is left unturned.
1. The Standard “General” Home Inspection
This is the baseline inspection performed during a real estate transaction. Almost every buyer starts with a residential home inspection.
A licensed home inspector performs a visual examination of the home’s accessible structural parts and major systems. This includes a visual check of the roof, the foundation, plumbing and electrical systems, windows, and doors. They will also inspect the HVAC (Heating, Ventilation, and Air Conditioning), the attic, and insulation.
This gives you a broad overview of the home’s condition.
2. Structural & System-Specific Inspections
If a general inspector finds a problem beyond their expertise, they refer you to a specialist. For example, foundation cracks or a sagging roof may require a structural inspection by a licensed engineer.
Specialized inspections are also needed for specific systems, often for safety or access. A detailed, climb-on or drone roof inspection is necessary for slate, tile, or steep roofs. Homes with a fireplace need a chimney inspection by a certified sweep to check the flue for creosote, structural integrity, and proper ventilation.
For mechanical systems, consider an electrical inspection, especially for homes over 40 years old, to check for knob-and-tube wiring or old fuse boxes. An HVAC inspection is more detailed; a licensed technician will disassemble the unit to check the heat exchanger and coolant levels. This is particularly important in older properties, where inspectors frequently encounter common electrical issues in Delaware homes, including outdated wiring, overloaded panels, or improper grounding.
3. Environmental & Health Hazard Inspections
These inspections look for invisible or hidden dangers that can affect the health of the occupants. Because these issues are often undetectable by sight or smell, specific testing is required.
- Radon Testing: Checks for the presence of radon, a radioactive gas that rises from the soil and can cause lung cancer. Radon testing is highly recommended in basements.
- Mold Inspection: Checks air quality and surfaces for mold spores. This is often recommended if the house has a musty smell or a history of water damage.
- Asbestos Inspection: Vital for homes built before 1980; this checks insulation, floor tiles, and pipe wrapping for asbestos fibers.
- Lead-Based Paint Inspection: Essential for safety in homes built before 1978.
4. Plumbing & Water Inspections
Water is one of the most destructive forces in a home, so making sure the plumbing is sound is critical. One of the most important add-ons is the sewer scope inspection. A camera is snaked through the main sewer line to the street to check for tree root intrusion, collapses, or clogs. This is highly recommended for older homes where clay or cast iron pipes may be failing.
If the property is not on city water, you will need a septic system inspection to check the tank levels, baffles, and the health of the leach field. You should pair this with water quality testing to check for bacteria (E. coli), nitrates, lead, and arsenic.
A well inspection is also necessary to check the mechanical pump, pressure tank, and water yield to ensure you have adequate pressure.
5. Exterior & Grounds Inspections
The land around the home is just as important as the structure itself. A pest/WDO inspection checks for Wood Destroying Organisms, specifically termites, carpenter ants, and powder post beetles. This is often required by lenders to ensure the structural integrity of the wood.
6. Insurance & New Construction Inspections
Insurance companies often require specific reports to bind a policy. A 4-point inspection looks strictly at the Roof, HVAC, Plumbing, and Electrical systems (common for homes over 20-30 years old). A wind mitigation Inspection verifies construction features that increase resistance to high winds, such as hurricane straps, which can result in significant insurance discounts.
For new builds, phase inspections are critical:
- Foundation: Checked before pouring concrete.
- Pre-Drywall: Checks framing and rough-ins before walls are closed.
- Final: The standard inspection before closing.
- 11th Month Warranty Inspection: Performed one month before the builder’s 1-year warranty expires to catch defects the builder must fix.
7. Thermal Imaging (Infrared) Inspection
While often part of a general inspection, this can be a standalone service, depending on the inspector. It uses infrared cameras to detect temperature differences that indicate hidden water leaks behind walls, missing insulation, or overheating electrical components.
8. Home Maintenance Inspection
A home maintenance inspection is designed for homeowners who want to stay ahead of costly repairs rather than react to them. Unlike a pre-purchase inspection, this focuses on wear-and-tear items, system performance, and developing issues that may not yet be visible or urgent. The inspector evaluates roofing, exterior drainage, HVAC efficiency, plumbing fixtures, electrical components, attic ventilation, insulation, and moisture-prone areas like basements and crawlspaces.
Home inspections play a critical role in protecting one of your largest financial investments by uncovering hidden issues that could compromise safety, performance, or long-term value. The purpose of home inspections is to give homeowners clear, objective insight into the condition of their property, allowing informed decisions before minor concerns escalate into costly repairs.
What’s Included in a Home Inspection?
While the list above covers specialized services, it is helpful to understand exactly what happens during the standard general home inspection. A professional home inspector follows a strict Standards of Practice to ensure nothing is missed.
According to standard industry guidelines, here is exactly what your inspector will review:
Structural Systems
The inspector examines the “bones” of the house. This includes the foundations, grading, and drainage around the exterior to ensure water flows away from the home. They will inspect basements, walkways, and the structural integrity of floors, walls, and ceilings. If the home has a crawl space, they will check it for shifting soil or damaged support beams.
Roofing
This is a critical visual assessment of the roof coverings (shingles, tile, or metal), drainage systems like gutters and downspouts, and flashings around skylights. They also check chimneys and other roof penetrations.
Note that while they check the exterior condition, this is different from a Level 2 internal chimney inspection, which requires a camera.
Electrical Systems
Safety is the priority here. The inspector reviews the service entrance and panels, branch circuits, and connected devices and fixtures. They verify that the home has working smoke and carbon monoxide detectors and ensure your outlets are GFCI-protected to prevent shock, especially in wet areas like kitchens and bathrooms. This thorough check of the electrical systems is vital, especially in older homes.
Plumbing
The inspector checks all fixtures and faucets, water supply systems, and drain, waste, and vent systems. They will test the water heater to ensure it is heating properly and venting safely. They also inspect flues, chimneys related to plumbing, and any sump pumps or fuel storage and distribution systems present on the property.
Heating, Ventilation, and Air Conditioning Systems
To ensure your comfort year-round, the inspector tests the heating and cooling system equipment. They will look at the condition of the ducts, vents, and flues to ensure air is flowing correctly and safely throughout the home.
Appliances
Built-in appliances are tested for basic functionality. This includes the dishwasher, garbage disposal, range hood, range or oven, cooktop, and microwave. They also check the trash compactor, bathroom exhaust fans, and the garage door operator to ensure safety sensors are working.
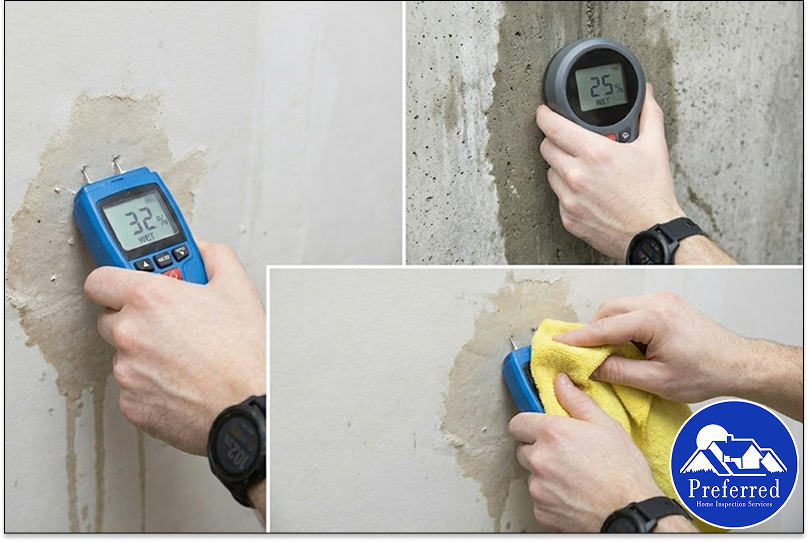
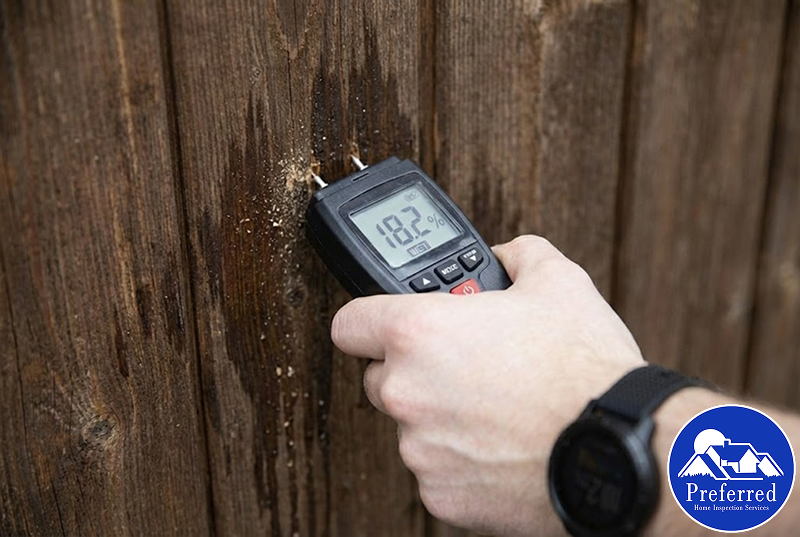
Moisture Problems
Finally, the inspector looks for signs of active water intrusion or past water damage. While this is a visual check for dampness and staining, it can reveal underlying issues. If they spot significant moisture, they may recommend a specialized mold inspection to test the air quality for invisible spores.

Need an Inspection? Contact Preferred Home Inspections Today!
Securing a future home should be straightforward and safe, even with the complexities of the real estate market. Since there are many types of home inspections to consider, you require an expert partner with deep industry knowledge.
At Preferred Home Inspections, we are true experts in the inspection industry. We go beyond the checklist to provide clear, accessible reports that give you the full picture of your investment. Whether you are buying a historic property or a new build, our team has the knowledge to identify underlying issues and provide peace of mind.
If you need a reliable home inspector in Delaware, let us help you move forward with confidence.
Contact Preferred Home Inspections today to schedule your appointment!